Showing posts with label before/after. Show all posts

Thursday, March 31, 2011

March De-Cluttering ReCap

Even though I spent some time this month de-cluttering and cleaning up spaces I never got around to writing about it.  So instead of a recap with links to the post, I’m doing it all in one.

Saturday, March 5th
I started with my cake decorating tool box.

The top tray…

Under the tray which didn’t look too bad…


Everything out of the box…


Cleaned up and organized…


What didn’t go back in the box, but did go in with the other cake decorating stuff I have…


That same afternoon I for some reason opened the cabinet under the kitchen sink and found two bottles of carpet cleaning stuff for the steam cleaning and a bottle of carpet stain remover.  Since all of my carpet was removed in January I decided I didn’t need them any more.  I actually pulled these bottles out and closed the doors, then actually came back and decided to clean out the cabinet while I was at it.

The before…


I’m not going to post the yucky before I wiped it all out pictures.
This is the after…


The ‘to go’ pile is on the left and the trash pile is on the right…


Last but not least for that day, one of the kitchen drawers…

The drawer before…


Everything pulled out of the drawer…


The organized and containerized drawer…


The pink container went into a different drawer a few drawers down.  I didn’t do away with anything in this drawer because while some of it may not be used often I like having it.

Sunday, March 13
Because I could not put off washing clothes any longer I needed to rescue the washer machine from being the catch all of the moment.

Before…


After…


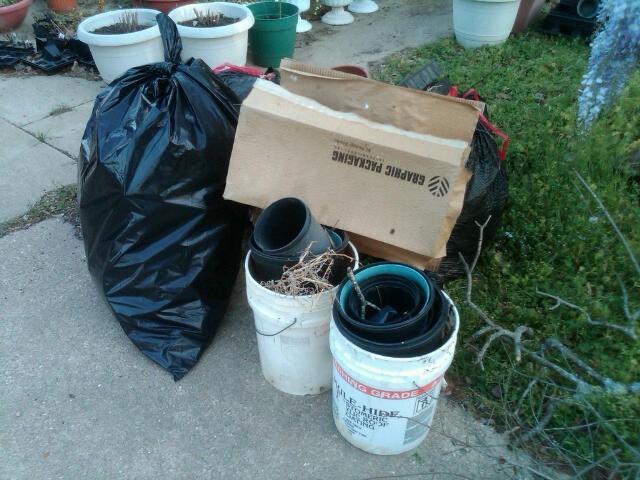
I'd hoped to get more done inside but I didn't manage too.  I did spend some time outside de-cluttering the yard though, which made a huge difference. 

I'm linking up over at A Slob Comes Cleaning.  Check it out to see more decluttering adventures.

March De-Cluttering: The Outside Addition

Last week in this post about dealing with my outdoor mess I had mentioned that I was doing some cleaning up.  I’m not sure if this counts to other people or not, but since it made a big difference in appearance and I got rid of things, I’m counting it as a de-cluttering adventure.

All of my flower pots ended up in a big square in my front year.  This square was at one time a flower bed, because of rotten timbers I just had them removed so it could become yard again.


I’d actually removed a few pots before this picture was taking, since it was an after thought.  I also did take the pictures with my cell phone, sorry.

This would be the trash after day 1. 


The pots shown are cheap pots.  The bonus of cheap pots is that they are, well cheap.  The crappy thing about cheap pots is that they usually don’t lost more than a summer in the Texas heat, they get brittle, crack or break when you pick them up.  I’d also whine about how people seem to have a habit of weed eating right against the pots, but I won’t.  First because I didn’t have to do it, and second because really they were stuck in the middle of the yard, then never moved because I never did that ‘I’m gonna’ that I had thought I would do.

The bag of trash is mostly the weeds and grass that were pulled out of the flower pots.


This is another area that I needed to work on.  This is also an after thought picture.  The large orange and green pots off to the left, as well as the two larger white pots on the steps were beside the steps. There were also some smaller pots along the front of the house.


This is the trash from day 1 and day 2.

Are you ready for some after pictures?  Hmmm?  I feel like I need a drum roll for this one!


This picture is why it is nice to take before pictures.  The after picture just looks like a normal yard huh?  But when you see the before picture you realize how much work was really done.


I pretty much weeded any pot that had dead flowers in it.  I was lucky enough to have some flowers that were come back so I weeded their pots, and in a few causes give them more room to spread.  I also planted the dahlia bulbs I bought, the one ‘flower’ I’ve allowed myself to buy so far.

I have learned that fire ants love potting soil, so if I find them in the pot, I totally ditch the potting soil.  Other wise I had to kill them, then be sticking my hands in potting soil with ant poison in it.  I had to do that with numerous pots this year.  Unless the pots were very large the potting soil got dumped into a couple of tubs so I can put it in the pot size I need and use it later.  I’ve got a pile of pots hanging out if I need them.

Of course I had a nice pile of trash when I was done.  And yes I know I could have carried the trash over after each day, but doesn’t this just look like I did so much more work? *wink*


Here is the pile of sticks I gather from the yard.  Sadly there are more out there that I will need to pick up before we can mow.


After 10 trips to the dumpster this is what I had.  I ended up keeping one of the buckets so that I could carry it around the yard to pick up sticks later.

The trays and stacks of little flower pots are going to be passed on to someone else to use, after I finish gathering the rest from off the porch.

I do still have more work to do but this was a great start and it make a big difference in how things looked out there.  I will also confess that I didn’t do anything out in the yard this weekend.  *frown*

But I’m not giving into that *I’m gonna* just yet.


Wednesday, March 2, 2011

The Dining Room: The Chairs

The furniture that is going in my newly painted dining room comes with history.  It belonged to my grandparents for about 37 years, and now it is mine.  I know that I’m lucky to be able to keep it and keep a part of my grandparents, but at the same time I’m still very emotional about the reason it is now in my house.  My grandpa passed away in 1991, so over the years I've come to think about the furniture as my Grandma's.  Only now, do I remind myself that it was theirs together.  I know it was something they worked hard to save up the money to buy. 

My grandmother passed away in December and I’m still battling the feelings of how it should be in her house with her there, rather than my house.  I can’t change that, so what I did decide to do is give her furniture an elegant room to reside in.

In the blank slate post I had posted the picture of the gorgeous fabric that I had bought for the curtains, valance and to cover the chairs with.  Thank goodness for half off sales, because it wasn’t the cheapest fabric they had, but it was the one I kept going back too.  Sunday while my mom was sewing the curtains, with as much non experienced help as I could give her, she said that my grandma would be proud of the work I’ve done on the dining room.  That means alot.

Ah, but this post isn’t about the curtains, it is about the chairs.  Meet the dining room chairs.


Grandma had many grand kids and great grand kids to help dirty up the chairs over the years.  I figured the best thing to do would be to recover them.

As with many projects it isn’t until you get started that you realize that there is more work to be done than you had thought there was.  At some point over the last 37 years two of the boards that the seat cushions were made to were cracked.  Out best guess is that someone stood in the chairs or something.  I am so very fortunate that my daddy is handy and comes with tools.  He cut out and fixed up me some new wooden bottoms for those two chairs.


When we were removing the blue covers on these chairs, this is what we found under them.  


Isn’t that just the loveliest color?  We had some debate on it, momma calls it gold, but me, I think it is more of a yellow green color.  While the blue was removed, we did leave the original, umm color on there.  Maybe when someone else decides they don’t like the covering I have on there, they will also get a kick of the lovely color hiding underneath.

Now for the finished product, the lovely chair with it’s pretty brown, blue and gold striped material…


I love them!  I also think grandma would love them as well.

I can’t express how lucky I have to have parents that would give up their Sunday afternoon to help their home improvement challenged daughter recover seat cushions.

Now I’m off to talk to my brother about another projects I want to work on…


I'm linking this up over at Delightful Order.


Friday, February 25, 2011

The Dining Room: A Quick Peak

I week ago, I posted about my Dining Room, and the clean slate I was started with.  I’m happy to say that Saturday I did have some moments while painting when I was really enjoying myself.  I loved the color blue I had chosen and that just left me feeling happy.  Of course after two long days which ended in very late nights, and paint that wanted to stick to tape rather than the wall, I was pretty much done in Sunday night when I feel into bed after .

I really wanted to move the furniture in today and spend the weekend filling the curio and china cabinets.  Unfortunately because I haven’t been able to check everything off my list, I’m not ready for that yet.  I think after the late nights last weekend, followed by a sore back and working during the day, I misplaced my motivation.

A quick peak at a before:


This is what a girl does late at night when she is running out of primer but hopes to get the top color at least started before going to bed.  Unfortunately, I had the slowest drying paint last weekend, and I went to bed with the walls looking like this.


And this is where I am now.  My Balmy & Leisure Blue on the wall, separated by my pretty chair railing, which will get its final coat of paint tonight.


Before this time next week I hope to have pictures that actually have furniture in them.  But since my before pictures didn’t and because I am proud of what I have done to this point I am linking up over at A Bowl Full of Lemons to share my progess so far.

Wednesday, February 9, 2011

A January Project: The Craft ‘Chest’

I wish I was a natural ‘out of the box’ thinker, but I’m not.  Thankfully, there are people out there that are.  And they are people that are kind enough to share their ideas.

I had seen some ideas online that use pieces of furniture for different things than they were made for.  Use a dresser for something other than clothes?  What a great idea! Since I had a piece of furniture, that I picked up at a garage sale 6 years ago, currently sitting in my house that I didn’t need for what it was meant to be used for, but I did need some extra storage. 

When I put everything back into the cake room / all purpose storage area, I had decided that it would be nice to separate craft/office type supplies from cake supplies.


The three boxes on top of the Chest of Drawers in the above picture, as well as the boxes on the table in the picture below are the items I had separated out that needed new homes.


Armed with some dollar store plastic containers I set about grouping things together.  It is really amazing how many rolls of tape or bottles of glue you find when you start putting them all in one place. 

I arranged and rearranged and ended up with this...


The Craft ‘Chest’ ended up being full when I got done.  While I would have loved to have some empty space in it, I decided not to stress over it.  As I sorted through the rest of the stuff in the house I’d have more to go it in, and when I got to that point, I’d re-evaluate everything in it.  My goal on the second look through will be to put more items from it into the garage sale pile.

While I only had one container of garage sale stuff in the end this time, I’m still happy to see all those empty containers behind it.  That makes me fell good, that at least the items that were in them are nicely organized in one place, and I don’t have to dig through several boxes to find things.  The two smaller boxes are on the right were odd stuff that didn’t end up fitting in with the craft stuff.  I’m working on homes from them.


I wanted to try the Chest of Drawers out with its new purpose in mind, before I got all into beautifying it.  If it works out well for me, then in the future I will consider giving it a paint job.  For now I’m perfectly fine with the way that it looks.

Tuesday, February 8, 2011

A January Project: The Cake Room

Well the Cake Room / General All Purpose Storage Room that is.

I do cakes as a hobby, but I also teach cake decorating classes at a local craft store.  This room has been pretty much a storage area for all things cake that I have collected over the last 10 years, and crafts/odds and ends, and the stuff I just haven’t known what to do with.

Back in the fall, it was decided that all the floors in the house would be replaced.  At that point I started cleaning this room up and putting some things in the garage sale pile.  I didn’t get a picture then, but I did remove several things from the room, including a large number of cake pans.

The floor replacement actually started on Jan 10th, and consisted of having to pack up all the rooms and move everything from one room to another while they pulled up carpet and laid new floors.

The below pictures are what I was left with from the fall clean out.  Like a lot of my projects I got stalled in the middle, and left everything as was. 

These are cell phone pictures, so the quality isn’t great.  At the time I did this, I didn’t know I’d be starting a blog.  I just wanted the pictures for my reference so I could see the difference.


The first is standing in the door way and then the pictures go counter clockwise from there. And yes those are four big 48x72x18 shelving units in this room. Plus the picture doesn’t quite show everything. There is a stack of boxes about waist high to the left side of the white shelving unit.

This is the empty room, after the new floor was put down.  Ahhh, a blank slate!


And this one, well this one is almost all of the cake stuff moved into my kitchen. It really doesn’t show the full scoop of things either. There were literally things piled and stacked from my fridge to the washer and drier. I even had boxes on top of the washer and drier.


I’m sharing this picture, because this was a little of my decluttering efforts. What cracks up me most about this picture?   Well my best friend’s daughter just turned 4. I’ve done all but this year’s cake, and I bought candles the last three years for the cake. And for any other of the number combinations, I’d have to wait two to three years to use them. Considering these have been in a box for probably at least 6 years, I decided it was time they go and when the time comes I’ll just buy new candles. Because really, am I going to remember I have them?


This is another decluttering of mine. The boxes are full of cookie cutters.  The bigger stack on the left would be the ‘to keep’ pile, but at least I was able to let go of about a third of it. That’s progress for me, especially when I didn’t think I’d get rid of any of them when I first started opening the boxes. I still have candy molds to sort through, but because I was able to condense down a lot, and I was already drained I decided that they could wait for another time.


And now… (You may want to go back up and look at the before pictures just for a moment.)
 

The white file boxes in the corner of the two shelving units are the candy molds that I need to go through. There are also some boxes that are on one of the shelves I’ll need to sort through as well.

Now I’d love to tell you that the other side of the room looked like this… 

  But then I’d have to be honest and show the other two pictures…


These two pictures show the rest of the stuff that came out of the room, that would need to go back in there or somewhere else.

At least 4 of the plastic containers (two tall and two skinny) were moved out to my storage building. I’m not sure if they are there to be stored or if I’ll put them on the garage sale side. But for now they are not in my house.

The metal boxes, there are two that size, and smaller ones inside of them, which are my cake travel boxes are also out in the storage room. I don’t want to get rid of them, but I won’t need them until the next convention I go to, which won’t be this year.

So this is the other side of the room now…


The boxes stacked in the corner are 3d or shaped cake pans. Most of the other boxes are papers, magazines and books. I’ll go through them and scan what I want to keep then get rid of the books. Right now, I have too many other things going on to worry with it. It’ll be nice to clear it out and have more free space. And the items from the Wilton tool box/Castle cake set and the 4 boxes to the left are items that I plan to use as give a ways for my students.

The only cake related items that were missing from these pictures are my two rolling tool boxes,
Wilton tool caddy and my bag, all of which are class stuff.
When the room was finished that day, there was also one wall that just two boxes of lids for various plastic containers.  My ‘craft storage’ has since been put on this wall.  And well to be honest other items have been moved into the room from the dining room clean out.  My Grandma’s Wedding China and all my vases/candle holders have been placed in here for safe keeping, for now.

 
I have two rows of empty plastic containers.  Some of these containers were used for the hallway/bathroom projects and also for the ‘craft storage’ (pictures coming soon for that project).


Since the fall quite a few items have come out of this room.  They have either been thrown away or put in the garage sale pile, so I really don’t have a clear idea of how much has left the room vs what stayed. My main objective was to get it cleaned out and organized, so I really haven't kept a tally while I was working on it.

I do know that by looking around the room that it definitely has less in it, especially randomly piled up. I also feel less stressed when I enter the room.

I did learn one lesson.  Do not use removable labels on plastic containers. They just don’t stay stuck.